/
Capture From A Device
Capture From A Device
- Brian Banet
Owned by Brian Banet
Sept 12, 2019
Analytics
Loading data...
Once configured and registered, a GlobalCapture button will be available from the MFP. Clicking the button will Launch the application on the device panel. If the device is setup to credential each user accessing it, users are first prompted to authenticate:
Once authenticated, or if credentials are saved, the user is prompted to choose their desired action of Capture or Search.

Customers in capture only environments will only see the Capture option at this stage.

Capture From A Device
- To scan and capture from your device, tap Capture.
- Select a workflow from the Destination drop down, and select either Scan or Scan & Preview.
- If necessary, adjust any scan settings for the capture task. Settings are specific to the device you are using.
- After the document capture, the file will be uploaded to the GlobalCapture server and continue to load the next screen (the preview will be displayed if it was selected). The screen that appears will vary depending on the release type of the Workflow selected.
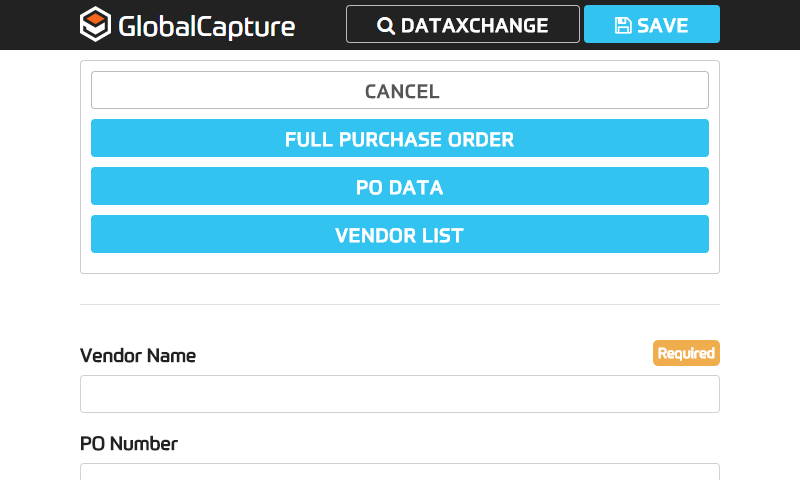
- If a workflow involves indexing the document, enter any appropriate field data and tap Save. Note that required fields will be marked with a Required tag above the field.
When GlobalSearch is part of the environment, DataXChange is available to assist with indexing from the device. Clicking the DataXChange option will prompt the user to select the source.
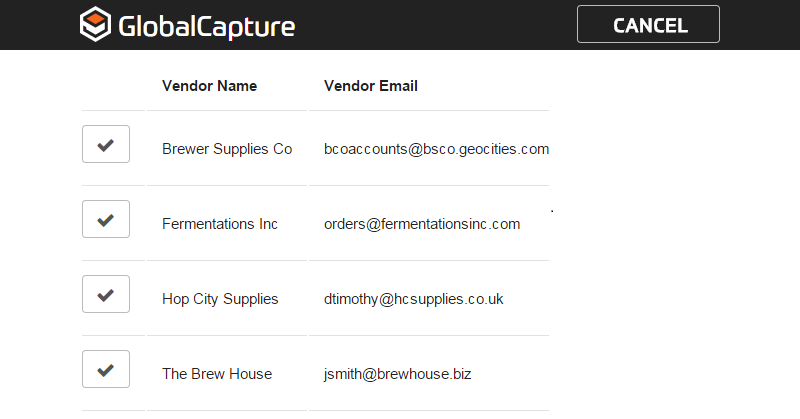
With a source selected, matching data will be displayed to complete the indexing process. Select one of the data records, or Cancel to abort the DataXChange process.


, multiple selections available,
Related content
Installation
Installation
More like this
Scan To File
Scan To File
More like this
Scan To File
Scan To File
More like this
Capture & Digital Transformation Options
Capture & Digital Transformation Options
More like this
Import Node
Import Node
More like this
Import Node (3.0.... and earlier)
Import Node (3.0.... and earlier)
More like this