QuickSync Bundle
Save time with your business using QuickBooks and QuickSync Bundle. Instead of typing information from a paper document into QuickBooks and then storing it in a filing cabinet, you can capture that document into GlobalSearch and push data to and from QuickBooks with a click of a button. QuickSync Bundle comes with all of the products needed for an integrated solution to synchronize your business information between GlobalSearch and QuickBooks.
The Bundle includes:
QuickSync – Use QuickSync to get data out of QuickBooks and available to GlobalSearch via assembly bound lists.
GlobalSearch Tabular Data Control – Connect GlobalSearch and QuickBooks Transactions with line items, using the Tabular Data Control module.
GlobalSearch Setup
Please refer to the GlobalSearch Server and Client Installation Guide for details on installing the Square 9 products.
Note: The GlobalSearch configurations necessary to use the features in the QuickSync Bundle must be done by a member of the GlobalSearch SSAdmin group or someone assigned database administration rights to the database with which QuickBooks data will be shared.. |
QuickSync Setup
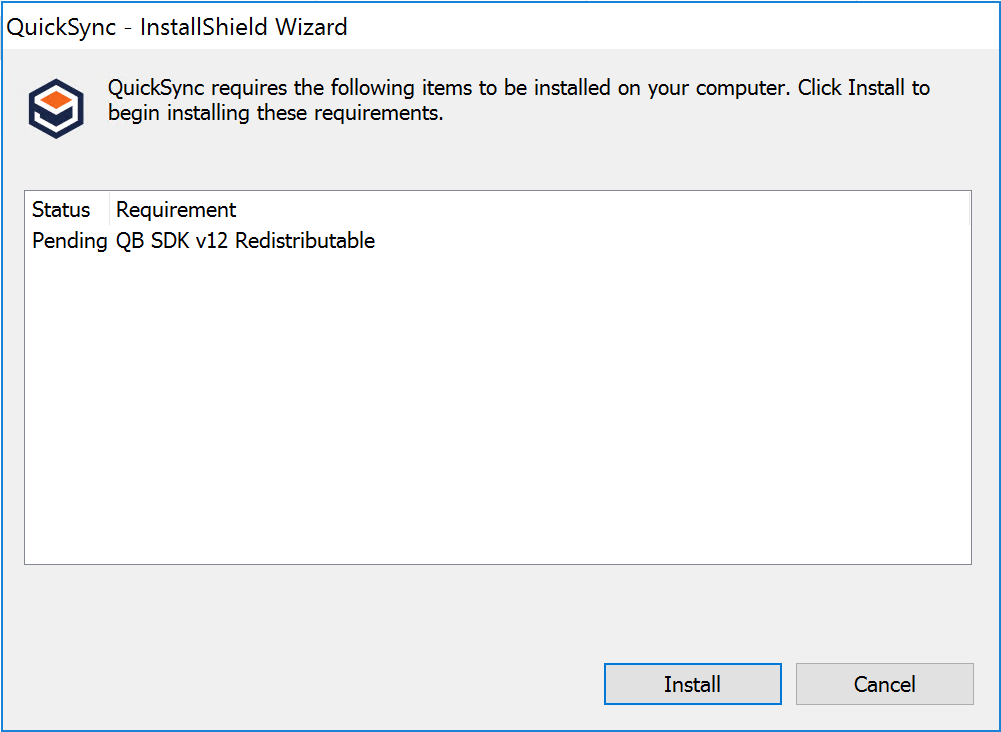
Begin the setup process by opening the QuickSync installer and running it as an administrator (Right click > “Run as administrator”). Install the Quickbooks SDK prerequisite.
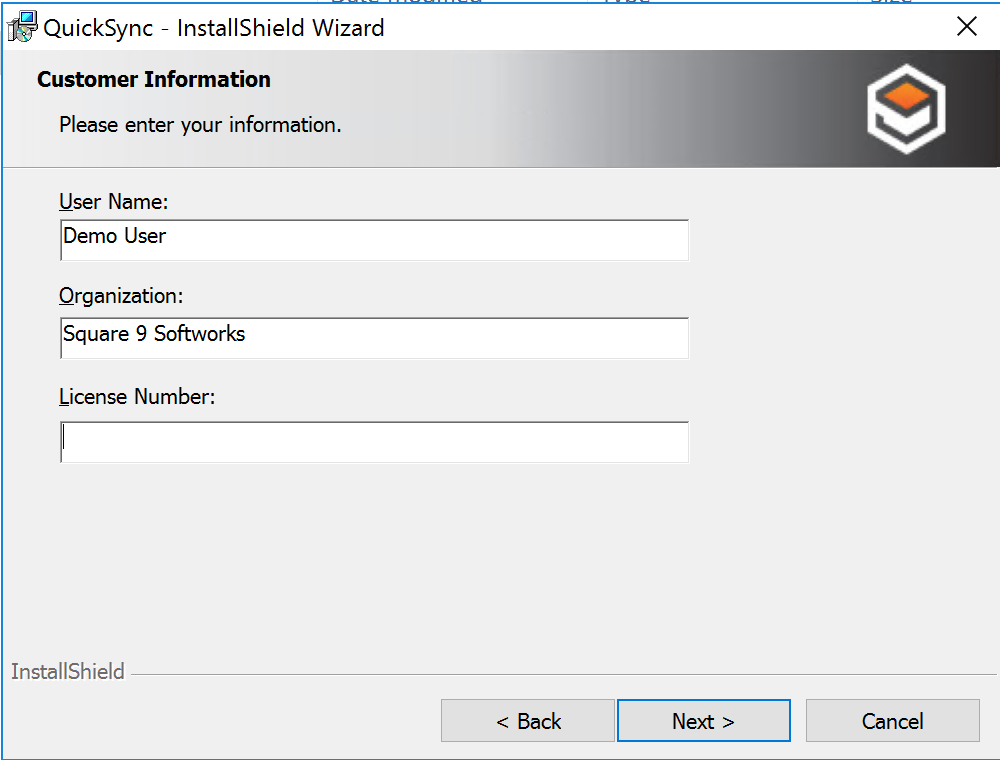
Enter your Name, Company, and QuickSync license number when prompted.
When prompted for the Database Information, select “Use existing GlobalSearch Server”. (If you are using QuickSync without GlobalSearch, proceed to the section below.) Select the existing GlobalSearch Server to integrate with, and then click the Install button. Once finished, you will be greeted with a confirmation page and given the option to launch QuickSync. Once you launch QuickSync, you can proceed to the following sections.
QuickSync Overview
QuickSync is a local database synchronization utility that lets you extract data from a desktop version of QuickBooks and stores it in a database, ready to be used. Streamline your QuickBooks documentation process using QuickSync with GlobalSearch or other line-of-business applications.
With the local copy of QuickBooks opened to the desired Company, QuickSync can pull data from a variety of documents, which QuickBooks refers to as “Transactions.” Transactions include Checks, Invoices, Bills, Credit Memos, Deposits, Estimates, Accounts, Vendors, Terms, Taxes, Classes, Customers, Customer Message, and Items.
See the “Create Lists,” “Create Fields,” and “Create Archives” sections below on configuring QuickSync. See the “Data from QuickBooks” section for using QuickSync.
QuickSync without GlobalSearch
QuickSync includes export scripts that will export the most common fields from each object to a comma-separated values (CSV) file. You can use this CSV data to populate other data sources in any manner you choose.
If you have purchased QuickSync to work with an application other than GlobalSearch, refer to the GlobalSearch Client and Server Installation Guide for details on installation and then proceed to the “Data from QuickBooks” section of this chapter for information on QuickSync settings.
Setting up GlobalSearch for QuickBill and QuickSync
API Full Access
In order to push data to QuickBooks with QuickBill, you must have the API Full Access security setting enabled for the GlobalSearch Archive associated with the QuickBooks Transaction. For further details on setting Archive security, please see the GlobalSearch Configuration Guide.
Select a GlobalSearch Archive for your QuickBooks data.
On the GlobalSearch Administration tab, in the Archives group, select Security.
Add a user or group of users from the Unsecured Users and Groups to the Secured Users and Groups.
In Permissions, expand the Folder Level Security and choose API Full Access.
Click Apply and Close.

Field Lists
You will need to create Fields in GlobalSearch to connect with QuickBooks. Several of these Fields will need Lists, which may be assembly bound lists. Prior to creating the Fields, create the necessary Lists. Refer to the GlobalSearch Configuration Guide for further details on creating Lists.
Tip: Make Fields and Lists for Future Use. While it is only necessary to create GlobalSearch Fields and Lists which are required for the QuickBooks Transactions which you are currently using, it is a good idea to create all of the Fields and Lists shown in the tables to prepare for future needs. |
Create Lists
From the GlobalSearch desktop or GlobalSearch web client, use the Field Catalog to create the specific Lists shown in the “Lists for QuickBooks Transactions” table below.
Tip: Name Lists to Show a Connection. While Lists for QuickBooks Transactions may be named as you wish, it is a good idea to name them in a way which indicates to which Fields they are assigned. This makes configuration and maintenance easier. A useful naming convention may be to add “QB” to the name. For example, the List containing various accounts “would be named “QBAccounts.” |
- Open the Field Catalog and click Field Lists.
- Click the Add button in the Manage Lists dialog box.
- Enter the name of the List in the List Name text box.
- Enter the values of the List in List Values as shown in the table below.
- Create the list for the Quickbooks Transaction Field and enter the list values shown in the table.
- For the Transactions which recommend using an assembly bound list, see the “Assembly Bound Lists” section which follows.
- Click OK and click Close.
Lists for QuickBooks Transactions
Suggested List Name | List Values | Required or Recommended | Notes |
<QB Accounts> | Recommend List is assembly bound | Required by QuickBooks | Used by the Account Name Field |
<QB Class> | Recommend List is assembly bound | Not required | Used for item classification |
<QB Customer: Jobs> | Recommend List is assembly bound | Required by QuickBooks | Used for the customer name |
<QB Customer Messages> | Recommend List is assembly bound | Required by QuickBooks | Used for message sent from QuickBooks with the invoice |
<QB Invoice Items> | Recommend List is assembly bound | Required by QuickBooks | Used for the item name |
<QB PO Items> | Recommend List is assembly bound | Required by QuickBooks | Used for the purchase order item name |
<QB QuickBooks Transactions> | Values: Bill, Invoice, Purchase Order, Sales Order, Sales Receipt | Required by GlobalSearch | Used for the transaction type |
<QB SO Items> | Recommend List is assembly bound | Required by QuickBooks | Used for the sales order item name |
<QB Terms> | Recommend List is assembly bound | Not required for Bills, required for Invoices | Used to define how and when vendors should be paid |
<QB Vendors> | Recommend List is assembly bound | Required by QuickBooks | Used for the vendor name |
Assembly Bound Lists
In order for GlobalSearch to use data pulled from QuickBooks using QuickSync, an assembly bound list is used to access the QuickSync data. QuickSync pulls data from QuickBooks and uses it to populate a database named QuickbooksSync. Each QuickBooks Company database that gets synchronized creates a separate collection and each document in the database is a single QuickBooks record. (If you are not using QuickSync in conjunction with GlobalSearch, you may skip to the “Data from QuickBooks” section at the end of this chapter.)
The Assembly Bound List for QuickBooks is distributed as a dynamic link library (DLL) named MongoListBinder.dll. In addition to the assembly DLL file itself, an assembly bound list is also dependent on an XML configuration file that is user defined. Each assembly bound Field List in GlobalSearch will specify a different configuration file that will be used to configure the connector for that List.
Create Assembly Bound Lists
To create Lists that contain the data from your MongoDB application, open the Field Catalog and select Field Lists.
Click Add in Manage Lists and enter the name of the List in the List Name text box.
Select the checkbox List is assembly bound.
Specify the path to the MongoListBinder.dll file on the GlobalSearch server using one of these methods:
Enter the full path in the Assembly Binding Server Path text box.
Click Browse then browse to and select the MongoListBinder.dll file.
Tip: Use a Task-Specific Folder for Your DLL. Consider putting your DLL file in a task-specific folder within \GetSmart. For example C:\GetSmart\ListBinderForQB\MongoListBinder.dll. Assembly bound XML configuration files must be in the same directory or a subdirectory of the one where the DLL file is located. Name DLL and XML Files Thoughtfully. The DLL name is specific and does not need to be changed. A new XML file will be created for each list and can be named at your discretion. As with any programming, spaces should be avoided in naming your files. While the DLL does not restrict the file name, it is a good idea to create file names in a manner which makes it clear what the file’s purpose is without having to open it. For example, for the lists Account, Vendor, and Terms, your files might be: MongoListBinder.dll, MongoABL_Accounts.xml, MongoABL_Vendors.xml, and MongoABL_Terms.xml. Once you have named the files do not rename them or connections will no longer work properly. |
In the Parameter String text box, enter the name of the XML configuration file, without the extension.
Click Test Load to test the connection.
Clicking the Test Load button will load any available data into the list. This is test data only and will not be used to fill the List data when the Field List is accessed in GlobalSearch or GlobalSearch. The data is loaded from the data source when a Field is accessed.
Click OK and Close.
CAUTION: When creating an assembly bound list in GlobalSearch to show QuickSync QuickBooks data, you will need to create separate GlobalSearch Field Lists for each XML configuration file that must correspond to the Transaction fields for the selected QuickBooks Company. For example, if you are creating lists for Account and Vendor in two different QuickBooks Companies, you will need to create four Field Lists. Also note that QuickBooks configuration allows for only one Company at a time be open for a connection. |
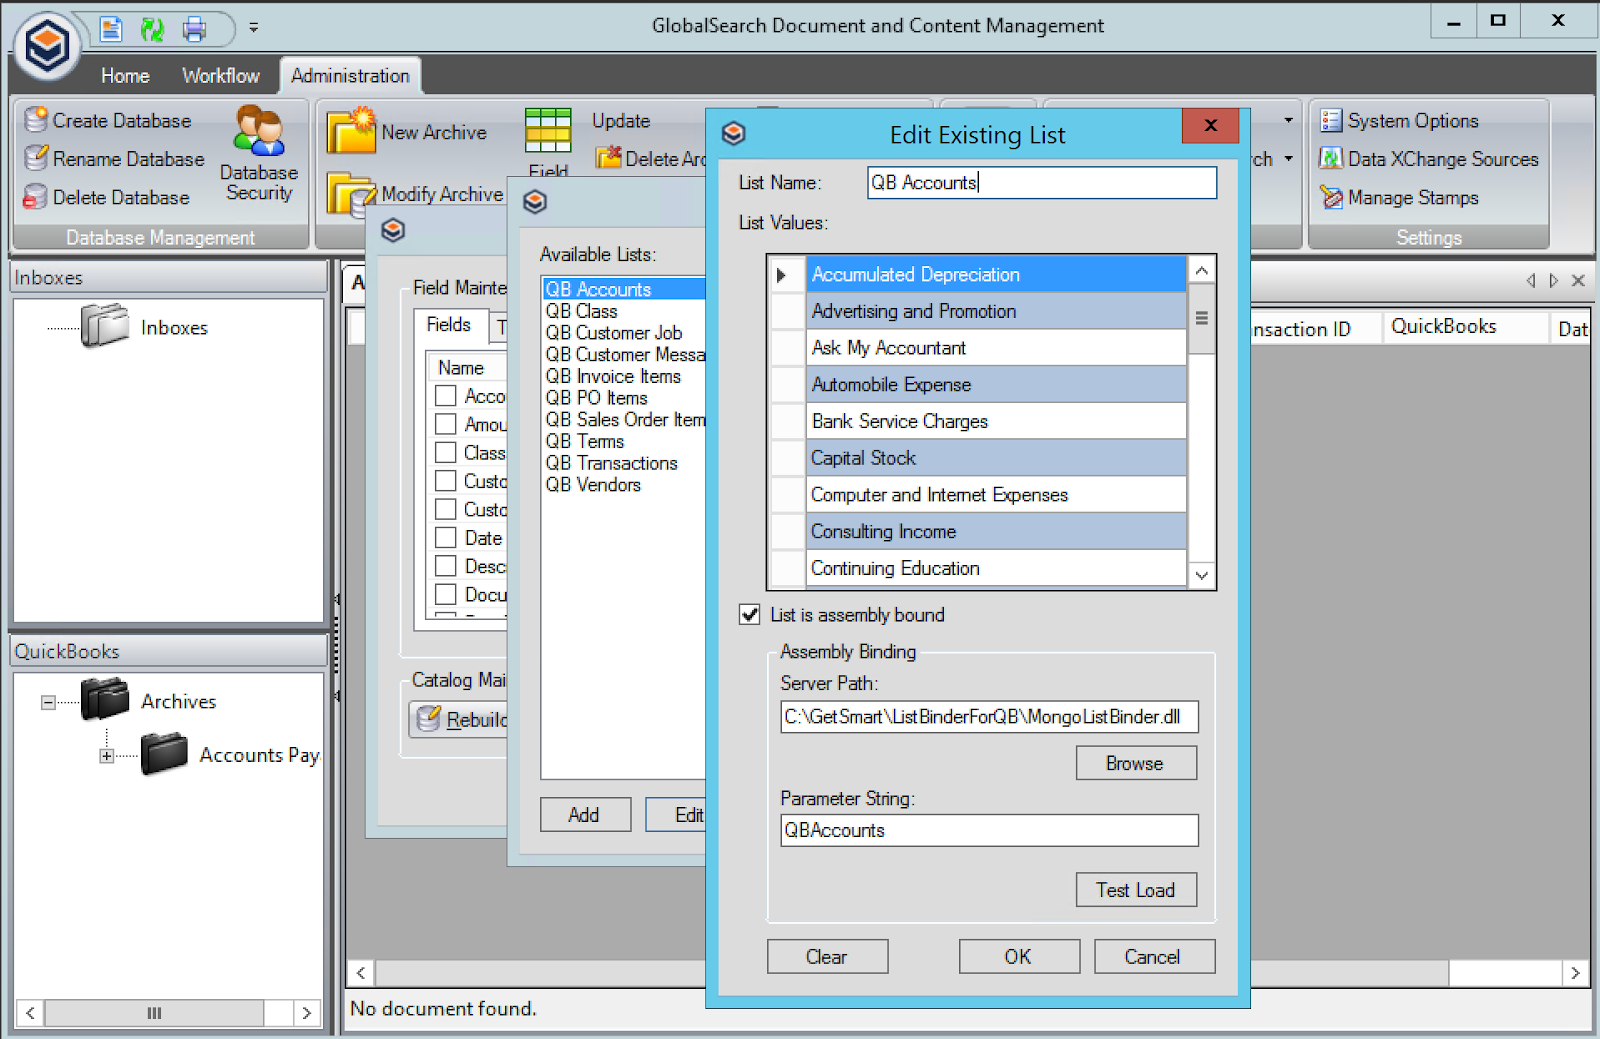
(Fig. 2.2 Example of an Assembly Bound List for Accounts)
Create Configuration Files
Each assembly bound list has a corresponding configuration XML file with the same basic structure, although it needs to be individually configured to access the correct QuickBooks records. The syntax resembles this example:
<ListSetup> <ConnectionString>mongodb://127.0.0.1</ConnectionString> <Database>QuickbooksSync</Database> <Collection>Square 9 Softworks Demo</Collection> <Search><![CDATA[{$match:{'Value.S9QBItemType':'Account'}}||{$project:{_id:0,"ListValue":"$Value.Name"}} ||{$sort:{“ListValue”:1}}]]></Search> </ListSetup> |
The XML file contains four user-defined parameters:
ConnectionString – The ConnectionString is the URL string to the MongoDB server. If the QuickSync data is not on the GlobalSearch server, specify the correct IP address to point to the proper file instead of using 127.0.0.1.
Database – The Database value is the database, named QuickbooksSync by default. This name can be changed, if you wish.
Collection – A separate Collection is available for each QuickBooks database from which data is pulled. Specify the QuickBooks database name for this collection.
Search – The Search value is the part that actual pulls data back (the command executed to return data). Each stage is separated by two vertical bars ( || ).
Behind the Scenes: The Search statement is embedded in a Character Data (CDATA) section. The tags indicate that the data between them should be interpreted as purely textual and not as XML markup. This prevents the XML parser from erroring on any invalid XML markup embedded in the statement. |
Excluding the CDATA section, the Search string syntax resembles this example:
{$match:{'Value.S9QBItemType':'Account'}}||{$project:{_id:0,"ListValue":"$Value.Name"}} |
This can be broken down into two separate statements at the two vertical bars:
{$match:{'Value.S9QBItemType':'Account'}} {$project:{_id:0,"ListValue":"$Value.Name"}} |
Edit the $match statement to identify the type of QuickBooks entry.
For example, for data from QuickBooks Accounts, specify Account in this section. For data from Vendors, specify Vendor.
Edit the $project statement to identify the field data in the database to be returned.
In the case above, Name is the field which will be pulled.
An error log named MongoListBinder_errors.log will appear in the same directory as the assembly bound list to aid in configuring the list correctly.
Once the assembly bound lists are created, configure GlobalSearch to bind the lists to the proper Index Fields, as defined in the next section.
Tip: Use a MongoDB Visualizer. Each QuickBooks record type has separate fields. To understand those fields in the database, it is recommend that you view the data using a MongoDB visualizer. |
Fields
In order to push data to QuickBooks, there must be Fields in GlobalSearch that correspond to QuickBooks Transaction fields. In the GlobalSearch Field Catalog, create the specific Index Fields and Table Fields shown in the “Fields for QuickBooks Transactions” table. Once Lists have been created, create Fields for indexing data for your documents and then attach the Lists to their corresponding Fields. Refer to the GlobalSearch Configuration Guide for further details on creating Fields and Table Fields.
Note: The availability of some data fields and QuickBooks Transactions (such as Sales Orders) are specific to the version of QuickBooks being used. Consult your QuickBooks documentation for details. |
Create Index Fields
The configuration of the Fields must be set exactly as described, including how Fields are named, the case, and any colon or spaces.
Open the Field Catalog and click the Add (plus sign) button.
Enter the appropriate name in the Field Name text box, as shown in the table below.
Select the type of data for the Field from the Data Type drop-down list, as shown in the table.
Set the Field Properties to Required for Transactions which are required, as shown in the table.
Set the Make Field a System Field to the default value of User Provided, except for the Transaction ID Field, which should be set to Read Only.
If a List is needed for your QuickBooks Transaction, assign a List to the Field:
Click the List button to attach a Pick List.
In the Edit List Field dialog box, click Standard Pick List and select the List from the Use keywords from following list drop-down list.
The names used in the table below are based on the names suggested in the Lists For QuickBooks Transactions table in the Field Lists section above.
In the List Options group, select Drop Down to ensure that the value meets QuickBooks requirements.
Click OK to save and close out of the dialog box.
Click OK.
Fields for QuickBooks Transactions
Field Name | Data Type | Required or Recommended | Assigned List | Notes |
Account | character | Required by QuickBooks | <QBAccount> | Used for the account name |
Amount | decimal | Required by QuickBooks | Used for the expense line item amount | |
Class | character | Recommended | <QBClass> | Used for item classification |
Customer:Job | character | Required by QuickBooks | <QBCustomer:Job> | Used for the customer name, must include the colon |
Customer Message | character | Required by QuickBooks | <QBCustomer Message> | Used for message sent from QuickBooks with the invoice |
Description | character | Recommended | Used to describe the item | |
Due Date | date/time | Recommended | Used for date the invoice is due to be paid | |
Document Type | character | Recommended | Used for the type of document | |
Expense Memo | character | Recommended | Used for notes | |
Invoice Date | date/time | Recommended | Used for the date the invoice was created | |
Invoice Item | character | Required by QuickBooks | <QBInvoice Item> | Used for the item name |
Memo | character | Recommended | Used for notes | |
PO Item | character | <QBPO Item> | Used for the purchase order item name | |
PO Number | character | Recommended | Used for the purchase order number | |
Quantity | decimal | Required by QuickBooks | Used for the quantity of items | |
Quickbooks Transaction | character | Required by QuickBooks | <QBQuickbooks Transaction> | Used for the transaction type |
Rate | decimal | Required by QuickBooks | Used for the payment rate | |
Reference Number | character | Recommended | Used for the invoice number | |
SO Item | character | <QBSO Item> | Used for the sales order item name | |
Terms | character | Recommended | <QBTerms> | Used to define how & when vendors should be paid |
Total | decimal | Required by QuickBooks | Used for the total amount of items | |
Transaction ID | character | Recommended | Set to Read Only; field gets backfilled by GlobalSearch | |
Vendor | character | Required by QuickBooks | <QBVendor> | Used for the vendor name |
Behind the Scenes: When documents are created through QuickSync, scanned through QuickScan, or indexed through QuickTicket, a unique ID is assigned to the record in GlobalSearch. This Transaction ID provides a link between the two applications that allows you to call up document from within QuickBooks through the QuickLinks module without having to open GlobalSearch and run a Search. |
Create Table Fields
From the GlobalSearch desktop or GlobalSearch Web client, use the Field Catalog to create the specific Table Fields shown in the “Table Fields for QuickBooks” table.
In the Field Catalog, on the Table Fields tab, click the Add (plus sign) to add a new Table Field.
Enter the specified name in the Field Name text box.
You can name the Table Fields as you wish. The names provided in the Table Fields for QuickBooks table below are suggestions only.
Select Fields from the Available Fields list and click the Add button to add them to the Chosen Fields list for that Table Field, exactly as shown in the table.
Click OK.
Table Fields for QuickBooks
Table Field Name | Chosen Fields | For Use With |
<Expenses> | Account, Amount, Expense Memo, Customer:Job | Bills with Expenses |
<Items> | Invoice Item, Description, Rate, Quantity, Total, Customer:Job, Class | Bill with Items |
<LineItems> | Invoice Item, Description, Rate, Quantity, Total | Invoices and Sales Receipts |
<POLineItems> | PO Item, Description, Rate, Quantity, Total | Purchase Orders |
<SOLineItems> | SO Item, Description, Rate, Quantity, Total | Sales Orders |
Tip: Name Table Fields After Transactions. While Table Fields for QuickBooks Transactions may be named as you wish, it is a good idea to name them in a way which indicates which Transactions they are assigned to. For example, the Table Field assigned to the Transaction called “Bills with Expenses” would be named “Expenses.” Both Bills with Expenses and Bills with Items. You could create a Table Field with Fields for both Expenses and Items. If so, only data of one type should be entered on each row; Expense data on one row and Item data on the other row. Entering data for both on one row will result in some data not being pushed. It is easier to create and maintain separate Table Fields. |
Create Archives
With the Index Fields and Lists created to meet QuickBooks requirements, create or modify the relevant Archives and assign the Fields and Table Fields to them. Refer to the GlobalSearch Configuration Guide for further details on creating and securing Archives.
Tip: Name Archives For QuickBooks. Archives and their names are not restricted by QuickBooks. However, it is a good idea to name your Archives in a way which makes it clear that they are configured for QuickBooks Transactions. For example, an Archive called “QB Bills.” |
Create a new Archive and enter a name in the New Archive text box.
For each Transaction type, from the Available Fields list, chose the Fields indicated in each Transaction sections below.
Click Save.
Archives for Bills
In the QuickBooks Transaction type “Bill” (otherwise known as a vendor invoice), you can allocate line items as either “Expenses” or as “Items.” Bills, Expenses, and Items must have specific Fields created in order to push data from a GlobalSearch document to a QuickBooks Bill. Create one or more GlobalSearch Archives to hold your QuickBooks Bill data.
Tip: Create Archives for Bills. While you can have one Archive for all of your Bills, if you are using both of the line-item types – Expenses and Items, creating one Archive for “Bills with Expenses” and another for “Bills with Items” will make it easier to create and maintain the proper Index Fields. Creating an Archive for Bills without Line Items first and then creating a Subarchive for Bills with Expenses and one for Bills with Items will save having to select the Bills Fields more than once. |
Archive for Bills without Line Items
Create an Archive and assign the following Fields to it:
Vendor
Reference Number
Due Date
Terms
Memo
Transaction ID
Document Type
Quickbooks Transaction
Archive for Bills with Expenses
Create As a Subarchive of the Bills Archive, create an Archive for Bills with Expenses with the following Fields (if created as a Subarchive, these Fields will be inherited by default):
Vendor
Reference Number
Due Date
Terms
Memo
Transaction ID
Document Type
Quickbooks Transaction
Assign the Table Field called <Expenses>.
Archive for Bills with Items
Create As a Subarchive of the Bills, Archive create an Archive for Bills with Items with the following Fields (if created as a Subarchive, these Fields will be inherited by default):
Vendor
Reference Number
Due Date
Terms
Memo
Transaction ID
Document Type
Quickbooks Transaction
Assign the Table Field called <Items>.
Archive for Invoices
Create an Archive and assign the following Fields to it:
Customer:Job
Reference Number
Invoice Date
Due Date
Terms
Memo
Transaction ID
Customer Message
PO Number
Quickbooks Transaction
Assign the Table Field called <LineItems>.
Archive for Purchase Orders
Create an Archive and assign the following Fields to it:
Vendor
Invoice Date
Memo
Transaction ID
Customer Message
PO Number
Quickbooks Transaction
Assign the Table Field called <POLineItems>.
Archive for Sales Orders
Create an Archive and assign the following Fields to it:
Customer:Job
Reference Number
Invoice Date
Due Date
Terms
Memo
Transaction ID
Customer Message
PO Number
Quickbooks Transaction
Assign the Table Field called <SOLineItems>.
Archive for Sales Receipts
Create an Archive and assign the following Fields to it:
Customer:Job
Reference Number
Invoice Date
Memo
Transaction ID
Quickbooks Transaction
Assign the Table Field called <LineItems>.
Data to QuickBooks
Data from GlobalSearch Desktop Client
Open a single Company in your local instance of QuickBooks and open a Transaction.
In GlobalSearch open a document in the Document Viewer and enter information in the Fields.
In the Quickbooks Transaction Index Field, choose the Transaction appropriate for the document (For example, if you are viewing an invoice, select Invoice, etc.).
Click Save Changes.
On the Content Management tab, in the QuickBooks group, click Send to QuickBooks.
Enter your GlobalSearch authentication information if asked for.
A confirmation message will appear to indicate a successful data push.

(Fig. 2.3 Push to QuickBooks button in GlobalSearch)
Data from GlobalSearch Web Client
Open a single Company in your local instance of QuickBooks and open a Transaction.
In GlobalSearch open a document in the Document Viewer and enter information in the Fields.
In the Quickbooks Transaction Index Field, choose the Transaction appropriate for the document (For example, if you are viewing a bill, select Bill, etc.).
Click Save Changes.
Click Actions in the toolbar and select Send to QuickBooks.
A successful data push updates the Transaction ID Index Field in the Document Viewer.
An unsuccessful data push causes a message to appear regarding the error.
For information on using the Batch Manager with errored documents, refer to the GlobalSearch Configuration Guide.

(Fig. 2.4 QuickSync Fields in GlobalSearch)
Tip: Save Often. Data displayed in the Index Fields may not reflect the data which is being pushed to QuickBooks. Data is only pushed when the changes to the document are saved. If another person is accessing the document that you have open, what you see on screen may not be what has been saved by the other user. It is a good idea to save document changes as soon as you make them and every time immediately before you push data. |
Behind the Scenes: Errors will be posted to a folder specified by the ErrorFolder element of the qbPushConfig.xml file. If the SingleSignOn element of the qbPushConfig.xml file is true, QuickSync will try to authenticate using the credentials stored in the ProtectedSettings.xml, otherwise it will prompt for a login. A successful login will not create or overwrite the ProtectedSettings.xml file. |
Data from QuickBooks
Start QuickSync
In in your local instance of QuickBooks:
Open a single Company.
Open a Transaction.
Enter the transactional data for that Transaction.
Double-click the QuickSync shortcut on the Windows desktop to launch QuickSync.
The QuickSync (Square 9 logo) icon will appear in your Windows system tray.
Configure QuickSync
Prior to using QuickSync for the first time, configure it to your desired settings. After the initial configuration, this section is only necessary if you need to make changes to the settings.
Start QuickSync and right-click on the QuickSync icon in the system tray.
Select Settings to open the Settings dialog box.
In the Items to sync group, select the QuickBooks items to be synchronized with GlobalSearch.
These settings go into the qbsyncConfig.xml file.
To configure QuickSync to run at a set time automatically in the background, select Timer On and enter the number of minutes in the Frequency in minutes text box.
Data which has changed in QuickBooks since the last synchronization will be updated in GlobalSearch and a confirmation message will appear.
The timer starts from the moment QuickSync is turned on. QuickSync continues to run until you right-click QuickSync and choose Exit. Although, if you close QuickBooks it will not have a data connection until you reopen the program.
Click OK.
Tip: Synchronize Multiple Users. To avoid any conflicting data updates, care should be taken to avoid synchronizations which occur at the same time, such as multiple QuickBooks users or a short time interval between scheduled updates. QuickSync will synchronize data only from whichever QuickBooks Company file is currently opened. Adjust Timed Intervals. Running QuickSync timer set for very short intervals (like once a minute) may not be recommend. Consider increasing the interval by several minutes or simply use the manual data push only when needed. |

(Fig. 2.5 QuickSync Settings)
Synchronize Data Manually
To synchronize the data between GlobalSearch and the open Company in QuickBooks, start QuickSync and then right-click on the QuickSync icon in the system tray.
Click Sync.
A message will appear to indicate a successful data push.
The first time you sync, you will have to allow QuickBooks to accept incoming connections whenever the database is open.

(Fig. 2.6 Allow Incoming Connections to QuickBooks)