...
Annotations layer in the order they are created. For example, if you create a Note, then draw a highlight, if the two overlap, the highlight will appear in front of the Note. You may customize your annotations including custom stamp creation, and color of a Note along with its font type, color and border, and set styles, if you wish. You can add annotations to any file format, but if you send out an email with annotations, the file will be convert to the PDF file format.
| Warning | ||
|---|---|---|
| ||
If you are working in an Archive where you do not have Modify Annotations permission, moving a document with annotations will cause any annotations to become a permanent part of the document. This means the annotations are embedded, and the document is now a new PDF. This is a permanent change, so care should be taken when secure archives with this type of process flow. |
...
- To highlight a portion of the document page, click Highlight and then drag to select the area.
- To add a stamped message, click Stamp and in Select a Stamp, choose a stamp. The GlobalSearch administrator can create system wide stamps, or users may create their own by clicking on the USER tab.

To black out an area of a page from general view, click Redact and then use your mouse to drag around the area to be redacted.
Info title Redact Documents with Care Any Annotation, including redaction, which is not burned into a PDF file can be changed by anyone with Annotation permissions to the document, so it may not be effective for blocking access to document information internally. For situations such as sensitive HR or medical records, a good solution might be to restrict access to original documents and make available only those PDF files which are correctly and permanently redacted.
For security, KeyFree Indexing will not do an OCR scan under a redaction created if the you do not have Modify Annotations permission for the document’s Archive.
Tip: Edit with “White Out.” Set the redaction color to white (or whichever color the document background is) to “erase” parts of a document. Also, if a redaction covers a large area of the page, when printing, selecting white instead of black saves on toner. Use this with care, as some industries have specific regulations regarding redaction colors.
- To add a Note, click Note and then drag to create the Note area. When positioned, enter your text.
- Image annotations can be added to embed a local image into a document. This is often employed by users looking to embed an image of their signature that is stored locally on the computer, or in other cases where an image or photo needs to be added to the document and adding a new document page isn't practical or necessary (insurance claims for example).
- Clicking the Image annotation will prompt the user to select or upload a new image. Images are only kept for the duration of the current viewer session. If a user were to select multiple documents, they would be able to apply the same image to multiple documents or pages without uploading it more than once, but only while the current viewer is open.

- Click the Upload button to select a new local image file. The Image annotation type supports files with extensions: "jpg", "jpeg", "bmp", "png", "gif", "tif", "tiff".
- Once uploaded, click the image.
Using the mouse, click and drag a box on the page where the image should be placed.
Info title Color Images Attaching images that are color have the potential to drastically impact a file's size. Use caution when embedding image annotations to prevent performance issues related to transmitting large files.
- Clicking the Image annotation will prompt the user to select or upload a new image. Images are only kept for the duration of the current viewer session. If a user were to select multiple documents, they would be able to apply the same image to multiple documents or pages without uploading it more than once, but only while the current viewer is open.
- You can electronically sign a document or create a freehand notation into PDF image file or TIF document. This is a “live” or “wet” signature. When the document is saved, marks made with the Sign feature become a permanent part of the document.

- Click Signature menu option. This menu pulls right, offering the user an option to freehand draw a signature or select an image annotation for signing.
- If using the freehand option, use the mouse to draw a box around the area where the signature should be drawn.
- In the Please Sign Below window, use the mouse pointer (using your finger, mouse, or stylus, depending upon your device) to draw a signature.
- Click Sign to add the signature or click Clear to erase the signature and try again.
If using the Image signature, use the instructions from point 5 above.
- Click Signature menu option. This menu pulls right, offering the user an option to freehand draw a signature or select an image annotation for signing.
- Several "drawing" annotations are available for more ad-hoc annotation needs. Click the Draw button from the Annotations menu and available options will open in the sub-menu.
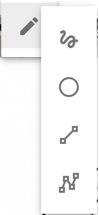
Options include Freehand, Ellipse, Line, and Lines.
...