You can quickly and easily separate a single page or split (or Burst) multiple pages of an image-based document (such as a PDF) to create a new record. Using the Thumbnails Pane in the Document Viewer, you can view and select specific pages in the document for “burstingbursting. ” With permissions, you can choose to delete the burst pages automatically from the original record or retained retain them. Note that Annotations are not included when you burst a document.
| Warning | ||||
|---|---|---|---|---|
| If you delete pages while you burst, the pages will be permanently deleted from the source document. It can be a good idea to keep a backup of original document files and to always delete while bursting document pages with care.||||
The option to delete the selected thumbnails when bursting is a destructive action. If you’ve chosen to enable the Delete Page checkbox, the thumbnails no longer display; the pages are removed from the source document file. If Delete Page was not enabled, the page or pages that were burst remain in the source document file. |
The Bursting option is only available from thumbnail viewer.
- To view thumbnails of the open multi-page document, on the Document Viewer toolbar, click Toggle Thumbnails.
- Click a thumbnail to select the page to be burst (or use common Windows® selection methods with Ctrl use Ctrl+Click or Shift+Click to select multiple thumbnails).
- Right-click the thumbnails of the pages to burst and click the pop-up Burst command from the context menu.
- If there are unsaved changes in the source document, you will be notified. Click OK to continue with the Burst and lose changes or click Cancel to cancel the Burst, so changes you may save your changes before bursting pages.
- In the Select Destination Archive dialog that appears:
- Select an Archive to burst the document to. (You must have Move permissions to the destination Archive.)
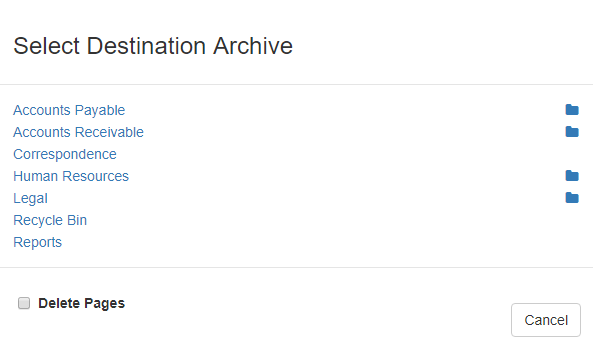
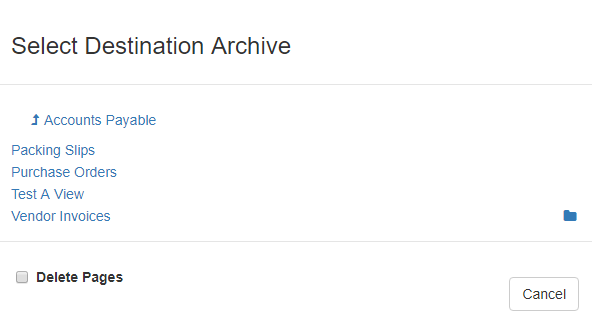
- To select a Sub-archive, click the folder icon to the right of the intended destination’s parent and navigate through the tree view until you can select the Sub-archive. You can navigate back to the parent Archive using the Up (arrow) icon to the left.
- Leave Delete Page unchecked (the default) to copy or enable Delete Page to remove selected pages from the source document.
- Select an Archive to burst the document to. (You must have Move permissions to the destination Archive.)
- In the Index Documents at Import interface, enter data in the Index Fields for the new document being created in the specified destination.
- Click Save to complete the burst operation and return to the original document.