...
This backup procedure covers GlobalSearch installations using the default settings. Custom installations locations are not covered in this guide; refer to your custom locations and files when backing up.
...
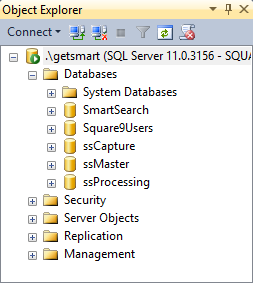
By default, GlobalSearch installs Microsoft SQL Server® 2012 Express and creates an instance called [machineName]\GetSmart. Within this instance there are the default databases. (The actual listed databases may vary, depending upon the your version of GlobalSearch and GlobalCapture, and any additional applications present, such as GlobalForms.)
...
- Connect to the GlobalSearch SQL instance (named GetSmart by default) in SQL Server Management Studio.
- Under
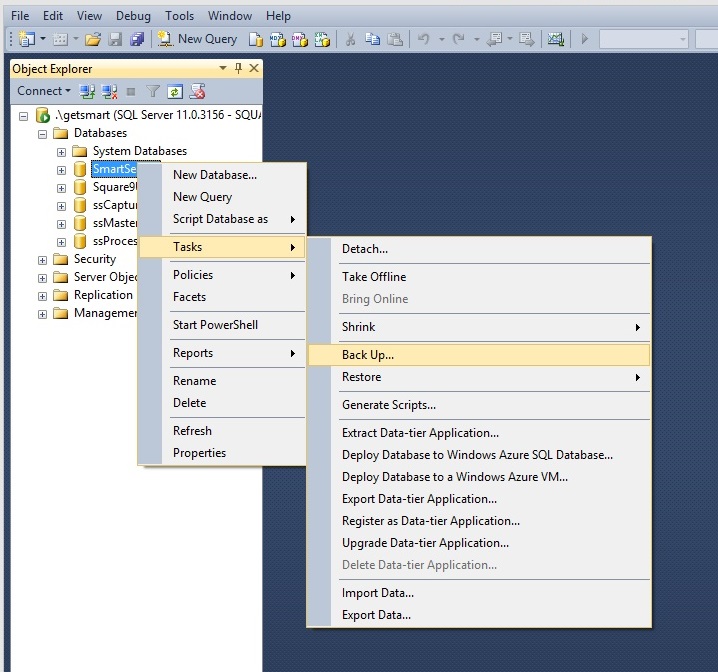
Object Exploreron the left-hand side, expand theDatabasesfolder. - Right-click the first GlobalSearch database in your list and go to Task > Back Up. The Back Up Database window should now open.
- In the Destination section, from the Back up to drop-down list, select Disk.
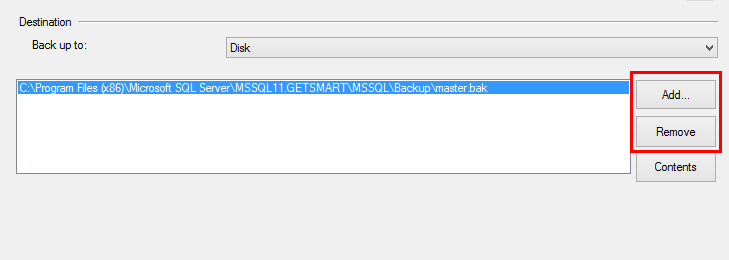
- In the Destination section, in the backup location area, do the following:
- If there is anything populated in this section, highlight the path and click Remove.
- Once the section is cleared click Add.
- If there is anything populated in this section, highlight the path and click Remove.
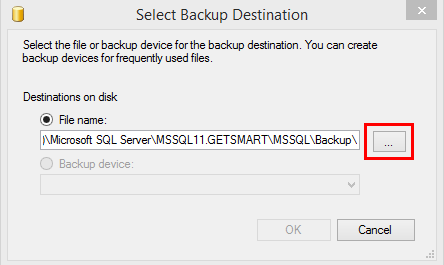
- In the Select Backup Destination window which appears, click the More Options (three dots) button.
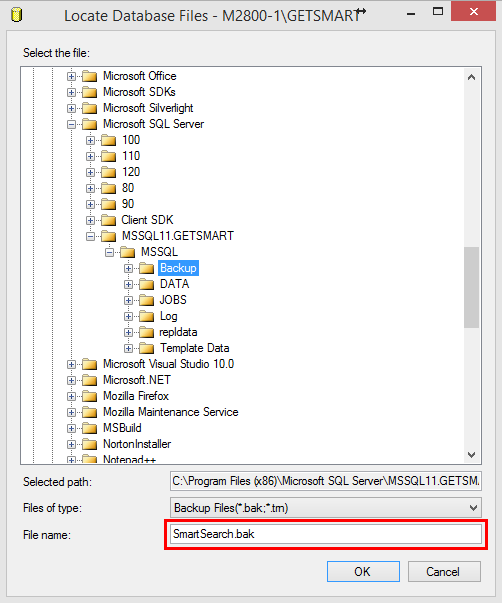
- In the Locate Database Files window which appears, do the following:
- In the folder tree view, select the destination location for the database backups. The default back up location will appear in the window.
TheBackupfolder listed is stored in the same location as the physical database files. While you can back up your databases to any location, having the backup files and database files in the same location can may be good, for organizational purposes. - To name the backup, in the File Name text box, enter the name, using the
backupname.baknaming format.
Although not required, it is a good idea to give the backup the same name as its database along with today’s date. - Click on OK to save the settings and close the window.
- In the folder tree view, select the destination location for the database backups. The default back up location will appear in the window.
- In the Select Backup Destination window, click OK. You should now see your chosen location and name in the Back Up Database window in the Destination group.
- To back up, click OK. There will be a pause while the backup is processing.
- Repeat steps 3 through 9 to back up your remaining GlobalSearch databases.
